Saturday, September 4, 2021

Coat With Simple Shawl Collar

 Now Making

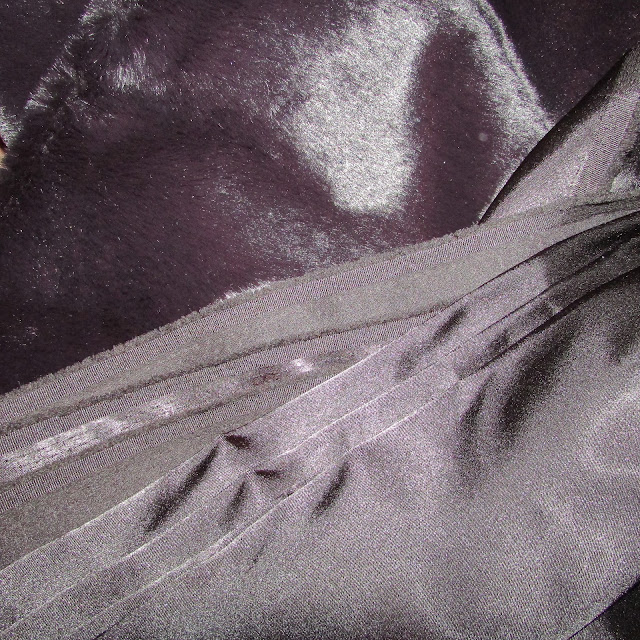
Fur Coat with Simple Shawl Collar and Side Pockets

Lined with Black Satin

Supplies:
Faux Fur
Heavy Satin Coat Lining
Firm up/Hair Canvas/Batting for Wide Lapel To standup when wanted
Pleather for Belt if wanted and Large accent button, maybe edge trim on side seam pockets

The perfect feel fur:


At this stage, I am adjusting level of side pockets-add on and I am making them fur for warmth.  I had two choices of pocket styles

So(sew), here is the traditional pocket piece you can take from any pattern and use on any other pattern in the side seam---or you can use a box shape which gives more room for your hand in a coat.  I prefer the hidden pocket, instead of the front rectangular box pocket.


the shape below is squared off at the bottom - so a little bigger

Unless your pocket is a different fabric and it adds design-it is better hidden in my opinion.

Nice Satin for Lining

Nice Pleather for Sash Belt and Large Button - maybe trim on Side seam pockets.  The Pleather I am going to use is suede on one side and pleather on the other.  Non-stretch... I believe I will try to rouche the middle of the belt and use a leather look buckle that is a pull through without eyelet holes, so It can be reversible.
I will make it adjustable in size that way as I don't have an exact measure and then the leftovers can go to accessories.  

I covered some large buttons, but I don't believe that will enhance the look of the fur.  I am experimenting as I go and everything I do with the coat has to be hand stitched before it is machine stitched to give it perfect look at seams.


Patterns to get the right lapel, flow and look


Batting-Hair Canvas-Black Firmup for ingredients for best large lapel collar Stablizing


This is the look we are going for... with optional pleather covered large buttons (2) and or Large Rouged back pleather belting with a pull through buckle.---Large Side Seam Pockets---Rounded edge lapels that are full.

Take all the best parts of three patterns and cut out.... and sew...
After sewing together before lining and some hand padding stitches


Interlining at hem has to be sewn in before the hem can be sewn to it and then the lining.
Kickpleat has to be sewn to interlining strip before lining can be sewn in

Nice kick pleat in back of long below calf coat will add design to the coat back

Pockets sewn into side seams have to be trimmed and then sewn down and toward front to flatten and also made out of fur for warmth will be hidden by lining


If there is leftover Fur

A Purse?... remember this one?


I can try this purse or clutch or both with the fur.. and Pleather combo


The left over fabrics did not go to waste..here is a clutch from the same fabric

Wednesday, September 1, 2021

Tuxedo BIb


For all the fabrics and bias Tape and a package of snagfree sew on velcro- This sticks to itself and does not catch on your creation.  I just cut a rectangular piece and hand sewn on the place where the top comes around.  This makes the bib totally reversible.

The velcro is in a package on the hooks by the zippers or you can order online


A Little Leftover Black Charmeuse and a piece of cotton on a
pleater board made this Tuxedo Bib for Baby going out to a wedding


Tuxedo shirt is narrow pleated with pleater board


Reverse side for Regular event


Tux in use at a wedding event


Cotton Sateen from the 2.97 room and some double fold narrow bias tape and a small amount of the same charmeuse from the Tuxedo side

Thursday, August 26, 2021

Quillow-I SPY Concentration with Scraps


Plan the Quillow

For  my Grandson

You can use paint on your laptop to map out your plan and figure yardage

You can put a handle on the quillow or make a separate little tote bag so they can use it as a picnic or play throw anywhere

add a little pillow on the top edge and they can use it as a nappy sack


The blocks are 10 inch using scraps

with an item in the center

Put Your small square in the middle and then fill in your block with scrap strips, so you use up all your scraps.

I first cut out all the pairs of small squares and laid them in a pile, and then just grabbed scraps and filled in the blocks after sewing the first small square on.


You could have a theme, Vegetables, Animals,

I am using my scraps from masks-so it is everything

B H or F  whatever your kids call it
Burger and fries block

P
Potato Chip Block


Whale Block-W
Truck Block-T


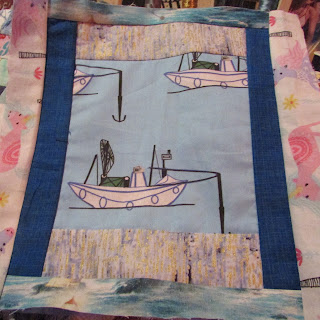
Kayak Block-K


I have 32 blocks- to I spy- 16 that repeat once somewhere

Each Center picture to have a solid color block cover that has the letter of the name on the front

flap underneath and a number of the sequence it is in on the quilt top.


After putting all the blocks out and figuring where they are going on the quilt- Numbers will be put on the front top of the flap so that you can say--  Number 5    or Number 7 and try to match the squares word items -like concentration....

I spy a  5 .....  matching I spy a  10

Learning Numbers and Letters and words and pictures all on one quilt....  Great quiet time game with themselves too!

You can make bigger quillow and do 52 blocks or more


To figure the yardages for the back- we know we want to match the front size of  92.5 length and 60 wide


We have three pieces that are 1/1/4 yards preshrunk to 40-41 inches wide and we figure the side borders subtract them out and then we know what they take up of 92.5
we need to make the 40 inch preshrunk measure add up to 60 inches... so we add a wide strip of color to the pieces to add up to total 60

we take the length we want subtract the borders and divide by 3 for the size of the pieces

Our front is 92.5 finished-subtract out borders = 85 1/2 divided by 3 = each piece 29 becomes 28 1/2 x 3 = 85 1/2 center only have 27
so add 2 and 2 

So 30 middle 27
bottom 30


The pillow pocket is one third of the measure of  the width
makes a nice 20 x 20 throw pillow and if you add a handle it is a great tote a long blanket throw
Step one  Plan
Step two-to motivate I sew the back together first without the borders..
then
Step Three - Make all the squares and lay them out on the back to see how to make the border frames to fill the size of the front

Step Four - sew the front together to the exact size it will be

Step Five - add the filler strips before the borders on the back to make the matching size to the front before its frame in borders

Step Six Finish the back
Step Seven - do a really cute pillow pocket and handles

Step Eight -Sandwich and plan the freemotion quilting

You can do a smaller quilt  just for play


There are 26 letters in the Alphabet so I wont have all the letters in the alphabet repeat

Pairs of everything so they can play concentration

In my case, I bought quarter yards of bright colored marble blender fabrics for the flap that goes over the I Spy concentration pic

Be back with more pics as I finish Steps

I...decided to quilt the back so I could freemotion differently than the front... so there will be a piece of flat batting on the back with quilting and the blocks will be sewn together with borders on the front.... then I can free motion just in the borders for fun before attaching the front to the back in a sandwich.  Then I will probably machine tie quilt at corners and center of blocks.... we will see what I come up with...


Sometimes people say .."How do you do all these things at once?"   I cut multiples... I have an accuquilt cutter and dies for letters... but in this case I had to make stencils for the numbers.. so it went like this

1.

I had a piece of plain cardboard that came in a package with a description.. lightweight like posterboard.
2.

I had a piece of create-a-pattern leftover from making a pattern from someones dress... if you do not know what this is... it comes double wide but looks sort of like interfacing but wider and just pellon type so it doesn't rip like your pattern tissue and easily folded.  I use it to make patterns, and then put the patterns in marked ziplocks.  There are scraps left over...so here is a case where the scraps came in handy - just like this whole quilt, but the back that was bought.

3.


I searched for a stencil pic on the laptop... made it the size I needed for these quiltblocks-prt sc (print screened) the picture and then pasted onto paint..


cropped it to the stencil piece and laid my create-a-pattern piece onto the screen-used a marker and traced off my laptop screen on paint and then voila... stencils... laid on top of the poster board cardboard and cut around the number... 

4.


lay a stack of fabric of different colors so I would have different colors of each number and cut around multiples.

Now this ISPY will also learn letters and numbers and can play concentration at nap time with themselves or during quiet time with others.

5.

Cutting many at once saves time and you are able to duplicate your projects by have the multiples ready after finishing one project to do a second.

I do the same thing with tops-jackets-and pants,etc.. cut out multiples and they are ready to sew more than one.  

Sunday, August 15, 2021

Mistakes to a New Creation

Everything Happens for a Reason
Get Lemons make Lemonade

Make a Mistake and the fix makes it GREAT1


Between my cutting on silk on my lap instead of a table, and dull scissors I did some wire cutting with..Ooops I mistakenly evened off a sleeve so one was a couple inches shorter than the other.

I cut off the end of the longer one and added an opposite grain assymetrical cuff and then added to shades of chiffon to end of sleeves.... I love it... Feels good, looks catchy.

Adding the same type of trim to the dress of the set... 


Thursday, August 12, 2021

Cleaning-scraps-baby things

 Cleaning and hate to waste scraps...

Got called into work, but before the call of duty...

Cutting circles of different textures to make a texture ball for the baby...

1. Cut the circles whatever size you want the ball

2. fold circles in half and stitch wrong side out on curve and leave opening.

3. sew a strip of fold over that you can use to hook the ball pieces together

4. stuff you pieces and 

5. sew them together... you can put a piece of elastic in the center to create a loop from the center so it can be attached to things but small enough not to interfere with the rolling.


v


Can't Wait to finish it and see him play with it
There he is.... I think he likes it!!


Sunday, August 8, 2021

Baby Things

 Baby Snuggler


Minky Wrap  Sack for when you want them cozy


Lambies appliqued on with satin stitch after quilting


Top shuts as a wrap over baby with velcro


First fold over one side then the other secured by a little strip of velcro


Burper quilted on Terry-Street has all colors of Terry
Lambie Fabric was found on the 8.77 cotton sale table


From our Bee Collection in the quilting section-a
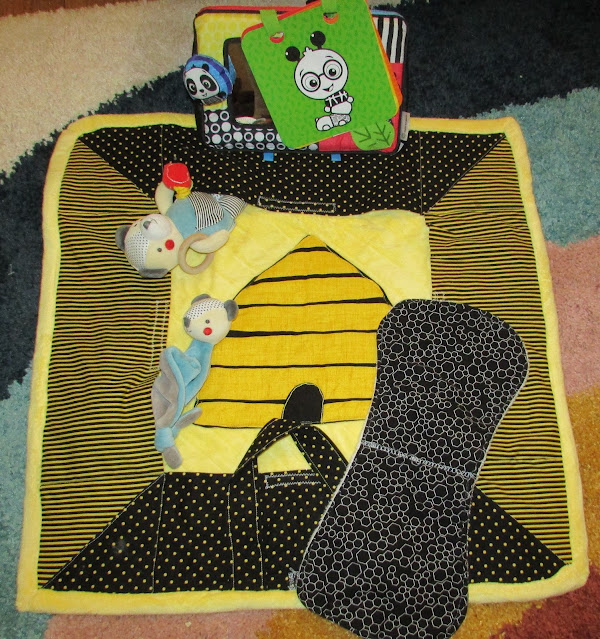
Beehive changing-play mat.

Rolls up and handles are out for carrying along with baby bee

In Use... Baby Bee loves the Yellow minky around the Bee Hive
that was quilted on.